Flora Fibres online shop now open!

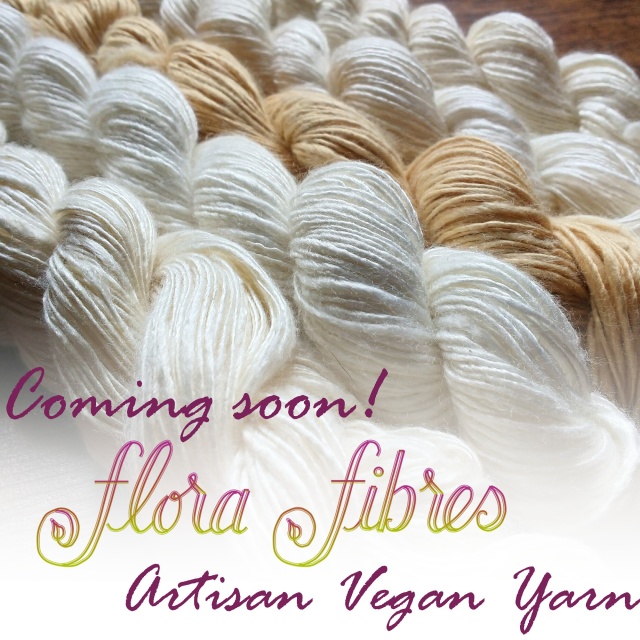
I’m very excited to announce the grand opening of my online shop for Flora Fibres yarn!

image

You too can now get your hands on some lovingly handspun, gorgeously shiny and silky soft yarns! What would you make?

Everything is 100% vegan and free from animal fibres, so it’s also an excellent choice for anyone with an allergy to wool.

image

This first shop update is all undyed yarn, perfect for using as is, or for you to colour to suit your own project! Choose from different lengths and weights of yarns made from fibres extracted from rose bushes, soybeans, seaweed, trees and bamboo!

And as a little extra I’m offering a special 10% discount to my very first customer, which will be deducted on the invoice. So, what are you waiting for?! 😉

Big news!

So you might have noticed I’ve been pretty quiet here recently, and that’s because I’ve been working away at a new venture that’ll be launching soon! If you follow me on Instagram you’ll have seen the announcement already, that I’ll soon be launching my own range of hand spun vegan yarns!

Let me explain a little about how this came about: I had a partly lovely, but also partly disappointing trip to the Edinburgh Yarn Festival last month. It was amazing to be surrounded by so many talented and creative people, and the beautiful colours everywhere were wonderful, but I was really saddened by the almost total lack of yarn which didn’t come from animal fibres.

Now, I know that I have bought and knitted with animal fibres, because it didn’t really occur to me to do otherwise. Even when I thought of myself as vegan it just wasn’t something that occurred to me. But after some research I decided that I wasn’t going to buy any more wool products as it turns out it’s not always as harmless as “just a haircut”. But we live and learn, and so I was excited to start finding alternatives.

So off I went to EYF sure I would find something lovely to treat myself to. Sadly this turned out to not be the case. I only found 2 sellers who had linen yarn, and a chance conversation with the lovely Louise from Spin City led to me buying some gorgeous “fake cashmere” fibres to spin. One thing I will say is my husband is glad there wasn’t much for me to buy 😉

image

(I also bought a needle gauge and some lovely buttons.)

So armed with my fibres and a drop spindle I set about making my first yarn:

image

image

And it’s fair to say I definitely caught the bug! I started researching spinning wheels and fibres as an idea started brewing in the back of my mind…

If there aren’t really many sources of high end, hand spun, hand dyed yarns which are free from animal fibres, then I should start making them myself!

And this is the inspiration behind my new company: Flora Fibres 🙂

wp-1462181345894.jpg

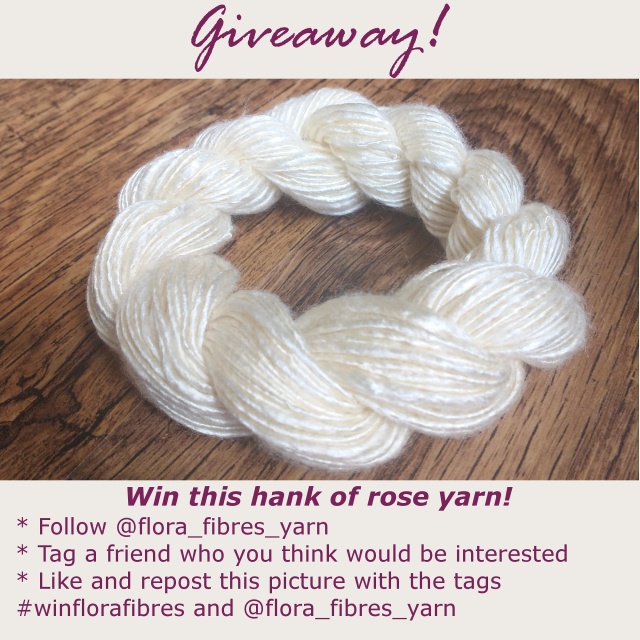
I’m currently in the process of setting up my e-shop, with a view to opening in 2 weeks (14th May) all being well! And in the mean time I’m running a giveaway over on my Instagram page where one lucky crafter can win a gorgeous hank of yarn made 100% from fibres extracted from rose bushes. Yes, really!

image

Enter a caption

So it would mean a lot if you lovely bunch could pop over there and show me some love! And telling your friends about it would be pretty awesome too. Let’s spread some vegan yarny love!

American-style aquafaba pancakes

Hands up who enjoyed a delicious plateful of pancakes yesterday?! I must admit that the fact it was Shrove Tuesday had very little impact on this household. We’re more of an ‘any excuse for pancakes’ type family! So we merrily jumped on the pancake bandwagon and enjoyed a lovely stack of vegan pancakes each. Except little brother that is. After desperately trying to get his hands on one while they were cooking, as in tried to climb out of the wrap on my back and over my shoulder desperate, he then cried when he was given one at the table and refused to eat it. Babies are weird!

image

Ingredients

200g plain flour
1.5 tsp baking powder
3/4 tsp salt
200ml soya milk
5 tbsp aquafaba (liquid from a can of chickpeas)
3 tbsp melted coconut oil
3 tbsp maple syrup

Add everything to a bowl, and mix until combined (don’t over do it, a few lumps are OK). Warm a heavy bottomed, non-stick frying pan on a low-medium heat until the whole thing is evenly heated (I’ve found this is the key to perfect pancakes). Add a ladleful of mixture to the frying pan at a time (it’s quite thick so won’t spread very far). Once little bubbles start to appear on the top side, while it’s still wet, carefully turn it over with a spatula. You will see it rise up as soon as it’s flipped. Cook for another minute or two until the second side is a light brown colour and it’s done!

Repeat with the rest of the mixture, then enjoy your delicious, fluffy pancakes! I had mine with maple syrup and fruit and they were yummy. Yay for pancakes! 😉

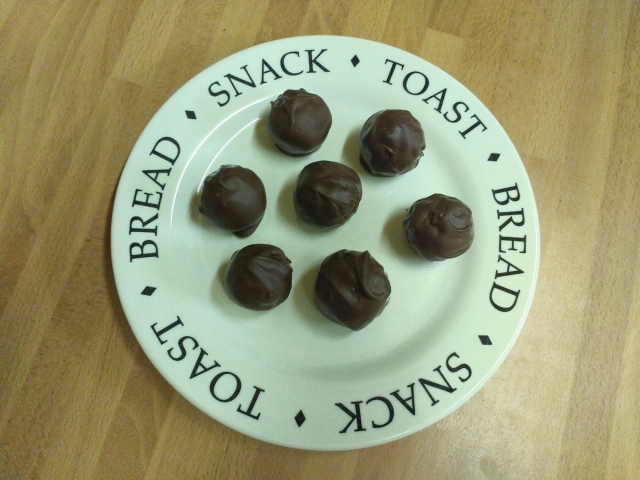
Chocolate coated peanut truffles

Otherwise known as little balls of deliciousness. Mmmmmm.
image

What if I were to tell you that these little beauties are vegan, gluten free, high in protein, and sugar free (without the chocolate coating, which you can substitute for cocoa powder for an equally delicious treat)?!? So good for you it’s definitely acceptable to even have some at breakfast time. *ahem* not that I’d ever do such a thing of course… 😉

Ingredients (makes around 50)

200g peanuts
240g (1 drained can) chick peas
2 tbsp coconut oil
2 tbsp aquafaba
1/2c dates
1/4c raisins
1/3c porridge oats

Dark chocolate or cocoa powder to coat the truffles.

Start by boiling the kettle and soaking the 1/2 cup of dates in a mug to make them soft.

If you are using salted peanuts pour them into a sieve and rinse the salt off under the cold tap. Then tip them into a food processor (no need to dry them first).

If you are using a can of chickpeas, then open carefully, drain the aquafaba into a container, and add the chickpeas to the food processor, along with 2tbsp each of coconut oil and aquafaba.

Blitz until the peanuts and chickpeas are well combined but still have some texture. Add the drained dates, raisins and porridge oats and mix until you have a fairly uniform, solid mixture that will hold its shape when rolled. If your mixture is too dry then add a little more aquafaba to reach the right consistency.

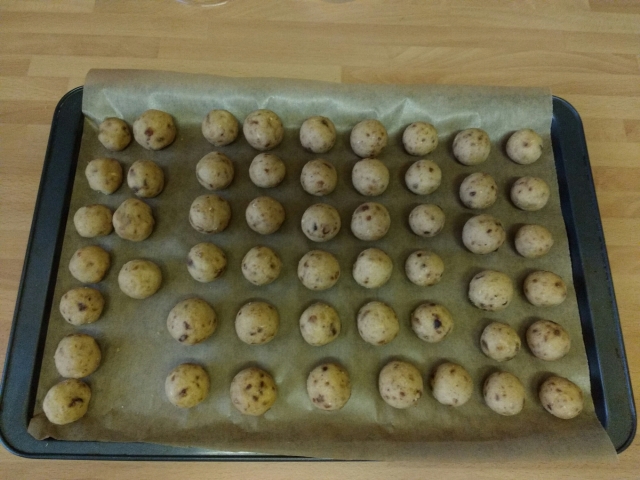
Take a teaspoon of the mixture and roll between the palms of your hands to form a ball, then place on a baking tray lined with greaseproof paper. You will get around 50-60 truffles depending on how many you eat while rolling how big you make them 😉
image

The 2 rows on the left were rolled by big brother, didn’t he do well?!

If your truffles are a little sticky, chill them in the fridge first before coating in either dark chocolate melted over a bain Marie, or rolling them in cocoa powder.

image

Try to resist the temptation to scoff the lot, at least before the chocolate has set!

And in case you are wondering, they definitely come with the boys seal of approval!

image

Chocolate, banana, chickpea and raisin flour-less cookies

Dear blog,
I’m sorry to admit that I’ve been cheating on you with Instagram. It’s just so quick and easy and I’ve not had the time to give you the love you deserve. Please accept this delicious and healthy cookie recipe I came up with as my apology! I’ll be back soon, I promise. Big kisses x

Ingredients

3/4 cup ground porridge oats
1/2 cup homemade peanut butter
1 can drained chickpeas
1 large banana
6 tbsp aquafaba
1 1/2 tbsp cocoa powder
1 tbsp agave nectar
1/8 tsp salt
1/2 tsp baking powder
1/3 cup raisins

Preheat the oven to 180°c and line 2 baking trays with greaseproof paper.

In a food processor blitz the oats to a fine consistency, then tip into a mixing bowl and set aside. Add the peanut butter to the bowl.

Open the can of chickpeas carefully and drain the aquafaba into a separate container. Tip the chickpeas and 3 tbsp of aquafaba, along with the banana, into the food processor and blitz until smooth. Add the remaining aquafaba, cocoa powder, agave nectar, salt and baking powder and mix until combined.

Scoop the chickpea mixture into the mixing bowl and gently stir in the oats and peanut butter. Add in the raisins and stir until they are well distributed.

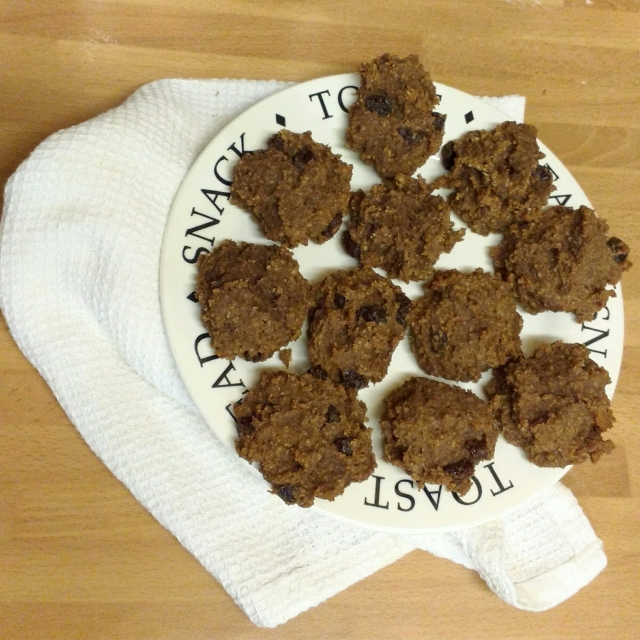
Place a large spoonful of the mixture onto the baking tray and form into a cookie shape, repeating until all of the mixture is used up. I got 23 fat cookies.

image

Bake for 18-20 minutes until the outsides have browned and are firm to the touch. Note however these will be quite soft cookies even when done, so don’t overbake!

Cool (or not, they’re also delicious hot!), eat, and store in an airtight container.

image

Enjoy! 🙂

And I promise I’ll try to be back to business as usual soon!

3 ingredient chocolate spread

Hello! Yes I know I’ve been a bit quiet recently, and I need to do a proper post to fill you in on what’s been going on, but for now here’s a tasty little something to keep you going 🙂

Incredibly easy, sugar free, vegan, 3 ingredient chocolate spread! If that doesn’t sound like Christmas come early I’m not sure what will! Haha

Ingredients (makes 1 jar)

1 cup of dates
3-4 tbsp cocoa powder
2 tbsp coconut oil

Roughly chop the dates and soak them until they are soft. Drain and put them in a food processor. Give them a quick blitz then add the cocoa powder and coconut oil before blitzing again until the mixture is smooth.

Transfer to a clean jar and keep in the fridge. Enjoy! (See, I told you it was incredibly easy!)

image

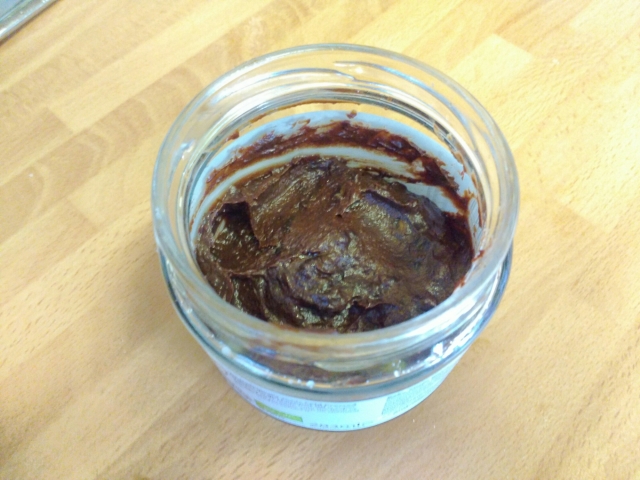
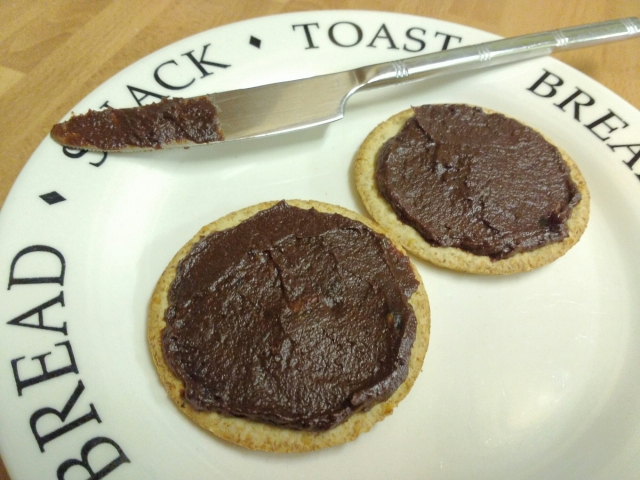
So far I have tried it on toast, oatcakes, and let’s be honest here: straight off a spoon. It is delicious!

image

You can see it’s not quite as smooth as commercial chocolate spread but I could probably have made it a bit smoother in the blender. Also I imagine this would also be delicious as a cake frosting as it has a slightly fudge-y quality to it.

I hope that has tickled your taste buds 😉

Sugar free cookie dough dip

Oh. My. Goodness.

Did you guys know about this already? And you didn’t tell me?!

I’ve been looking for other uses for chickpeas, now that my head is full of aquafaba recipes, and I stumbled upon this recipe on ‘Chocolate Covered Katie’ for a cookie dough flavoured dip which is sugar free, high in protein, and very delicious!

I made a few tiny changes to the recipe, but it’s essentially the same:

Ingredients

1 tin of chickpeas, drained
1/4 cup nut butter (I used peanut butter so my dip does have a slight peanut butter taste)
1 cup medjool dates
Heaped 1/8 tsp salt
1/8 tsp bicarbonate of soda
1 tbsp vanilla extract
2 tbsp oats
Soya milk (as required to get the desired consistency, I used about 2 tbsp)
1/3 tbsp chocolate chips

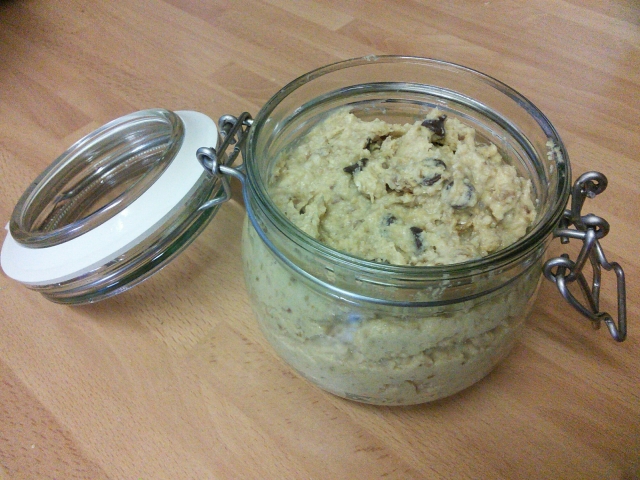
It’s so simple to make too, you just put everything except the chocolate chips in a food processor, blitz, add the chocolate chips, and eat!

image

Now, if you’ll excuse me, I’ll be over here stuffing my face… 😀

Accidental lemon fudge

I think I’ve accidentally invented lemon fudge! Is it already a thing? I don’t know, I’m pretty pleased with myself either way!

As I was working on the lemon curd recipe, some of it was cooked for slightly too long (like maybe a minute, not much). I could tell it was too much but I popped it in the fridge anyway to see how it would turn out.

image

And the answer is delicious! Haha 🙂 The texture is exactly like a gooey fudge but with the flavour of lemon curd. It’s one mistake I will happily make again!

Even better vegan lemon curd

Remember I made lemon curd a few weeks ago? It was pretty good, but after a little experimentation this afternoon I’m going to go ahead and say that this recipe is better, more authentic and downright delicious!

Ingredients (to make 1 jar)

9 tbsps aquafaba
9 tbsps lemon juice
6 oz caster sugar
3 oz coconut oil
3 oz vegan margarine
Zest of 1 lemon (optional)

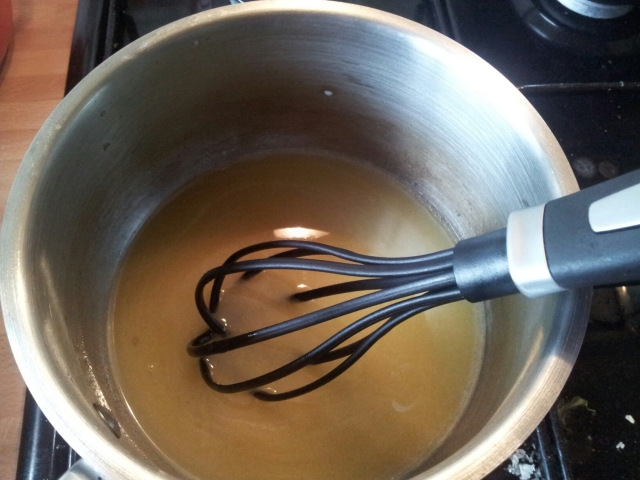
Add all the ingredients to a saucepan and whisk continually over a medium-low heat.

image

The mixture will start out clear but around the 7-9 minute mark will thicken and become opaque. Turn the heat right down and continue stirring for a further 2 minutes.

image

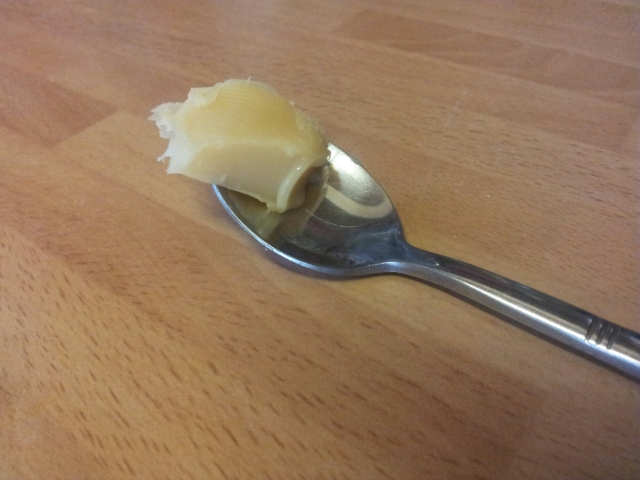
Remove from the heat and carefully pour it into a sterilised jar. Leave it to cool completely, to make sure you don’t burn your tongue! (Not that I’m speaking from experience…. oh no 😉 )

Spread on toast and enjoy!

image

No I haven’t eaten nearly three whole jar already, I made a 1/3 quantity as a test!

The next test will be to see if this lemon curd works better in a lemon meringue pie! Watch this space 🙂

Individual summer fruit pavlovas

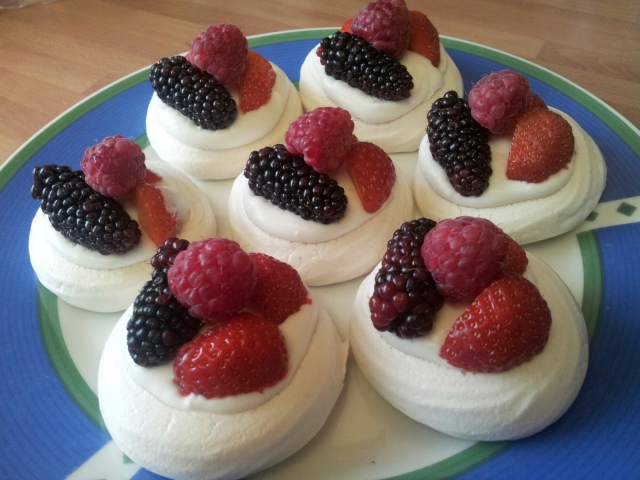
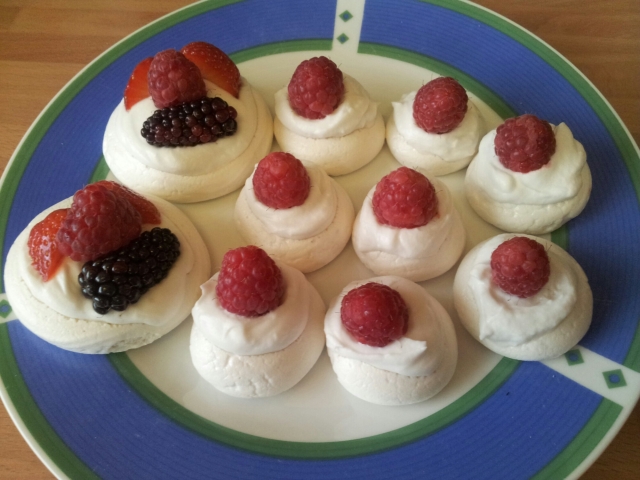
We had friends over today for a “summer” barbeque (cardigans and jeans were worn, it was not a summer BBQ like some people might picture!). So I decided to add to the summery feeling with some individual summer fruit pavlovas.

These were easy but fancy looking little desserts that went down very well with everyone (we all had more than one!). Unfortunately they had to be assembled right before serving though as the coconut cream did start to dissolve the meringues, so if you decide to make these then make sure to leave yourself a few minutes for assembling!

Ingredients

For the meringues

  • liquid from one can of chickpeas/beans* (about 3/4 cup)
  • 1/8 tsp apple cider vinegar
  • 3/4 cup caster sugar
  • 1/2 tsp vanilla extract

*this time I used a tin of 3 bean salad. Interestingly the aquafaba from this tin was much thicker than from chickpeas or butter beans, and it also took much longer to whip up. But it still worked and gave a lovely, thick mixture.

For the coconut cream

  • 1 tin full fat coconut milk
  • 2-3 tbsps icing sugar

To finish

  • Stawberries
  • Raspberries
  • Brambles

(or any combination you like!)

To make the meringues: Preheat the oven to 100 degress Celsius. Add the aquafaba and vinegar to a non-plastic bowl and whip until you have stiff peaks. Slowly add the sugar a spoonful at a time, waiting until the previous spoonful is completely combined before adding any more. When all of the sugar is incorporated and there are glossy, stiff peaks, add the vanilla extract and mix it in.

Line a baking tray with parchment and pipe the mixture into meringue nests, or kisses for bitesized pavlovas. Place in the centre of your oven and bake for 90 minutes. Once baked turn off the oven and leave the meringues inside to cool for a couple of hours until they are completely cold.

To make the whipped cream: Chill the coconut milk in the fridge overnight, this will cause the contents of the tin to separate into the solid cream, which will float on the top, and the water underneath. Carefully spoon out the solid cream into a bowl, trying not to pick up any of the water as this will affect the consistency of your whipped cream. Add the icing sugar, then using an electric mixer whip your cream to the desired texture making sure you don’t leave any lumps.

To make up: Either spoon or pipe about a tablespoonful of whipped cream into the centre of the meringue nest, or about a teaspoon on top of the meringue kisses. Decorate with the fresh fruit and serve to your suitable impressed guests 🙂

image

image

I have some ideas about different flavour combinations for these pavlovas, so watch this space…