Flora Fibres online shop now open!

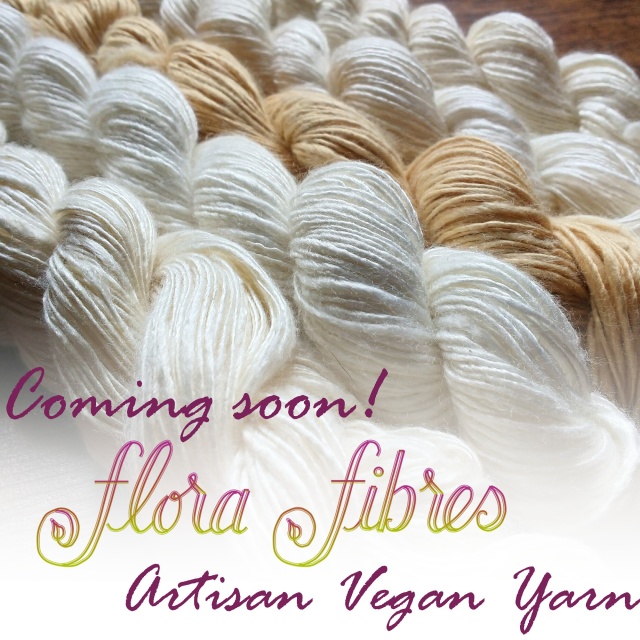
I’m very excited to announce the grand opening of my online shop for Flora Fibres yarn!

image

You too can now get your hands on some lovingly handspun, gorgeously shiny and silky soft yarns! What would you make?

Everything is 100% vegan and free from animal fibres, so it’s also an excellent choice for anyone with an allergy to wool.

image

This first shop update is all undyed yarn, perfect for using as is, or for you to colour to suit your own project! Choose from different lengths and weights of yarns made from fibres extracted from rose bushes, soybeans, seaweed, trees and bamboo!

And as a little extra I’m offering a special 10% discount to my very first customer, which will be deducted on the invoice. So, what are you waiting for?! 😉

Big news!

So you might have noticed I’ve been pretty quiet here recently, and that’s because I’ve been working away at a new venture that’ll be launching soon! If you follow me on Instagram you’ll have seen the announcement already, that I’ll soon be launching my own range of hand spun vegan yarns!

Let me explain a little about how this came about: I had a partly lovely, but also partly disappointing trip to the Edinburgh Yarn Festival last month. It was amazing to be surrounded by so many talented and creative people, and the beautiful colours everywhere were wonderful, but I was really saddened by the almost total lack of yarn which didn’t come from animal fibres.

Now, I know that I have bought and knitted with animal fibres, because it didn’t really occur to me to do otherwise. Even when I thought of myself as vegan it just wasn’t something that occurred to me. But after some research I decided that I wasn’t going to buy any more wool products as it turns out it’s not always as harmless as “just a haircut”. But we live and learn, and so I was excited to start finding alternatives.

So off I went to EYF sure I would find something lovely to treat myself to. Sadly this turned out to not be the case. I only found 2 sellers who had linen yarn, and a chance conversation with the lovely Louise from Spin City led to me buying some gorgeous “fake cashmere” fibres to spin. One thing I will say is my husband is glad there wasn’t much for me to buy 😉

image

(I also bought a needle gauge and some lovely buttons.)

So armed with my fibres and a drop spindle I set about making my first yarn:

image

image

And it’s fair to say I definitely caught the bug! I started researching spinning wheels and fibres as an idea started brewing in the back of my mind…

If there aren’t really many sources of high end, hand spun, hand dyed yarns which are free from animal fibres, then I should start making them myself!

And this is the inspiration behind my new company: Flora Fibres 🙂

wp-1462181345894.jpg

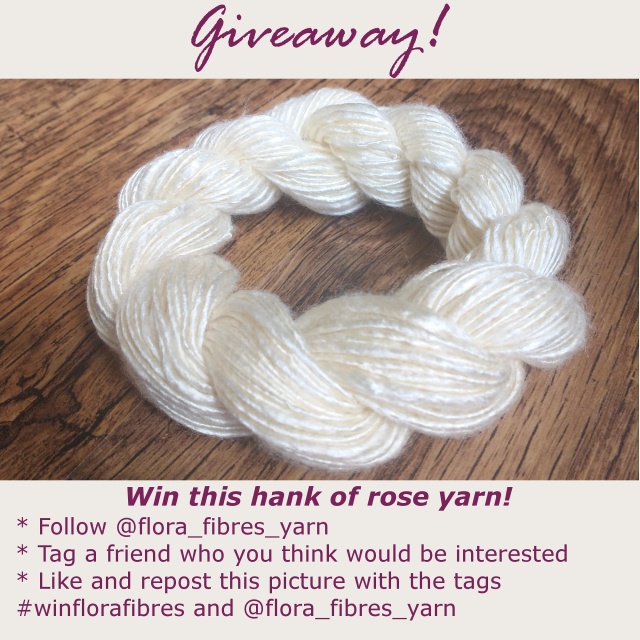
I’m currently in the process of setting up my e-shop, with a view to opening in 2 weeks (14th May) all being well! And in the mean time I’m running a giveaway over on my Instagram page where one lucky crafter can win a gorgeous hank of yarn made 100% from fibres extracted from rose bushes. Yes, really!

image

Enter a caption

So it would mean a lot if you lovely bunch could pop over there and show me some love! And telling your friends about it would be pretty awesome too. Let’s spread some vegan yarny love!

Pattern testers wanted!

Peekaboo! I’m all done!

image

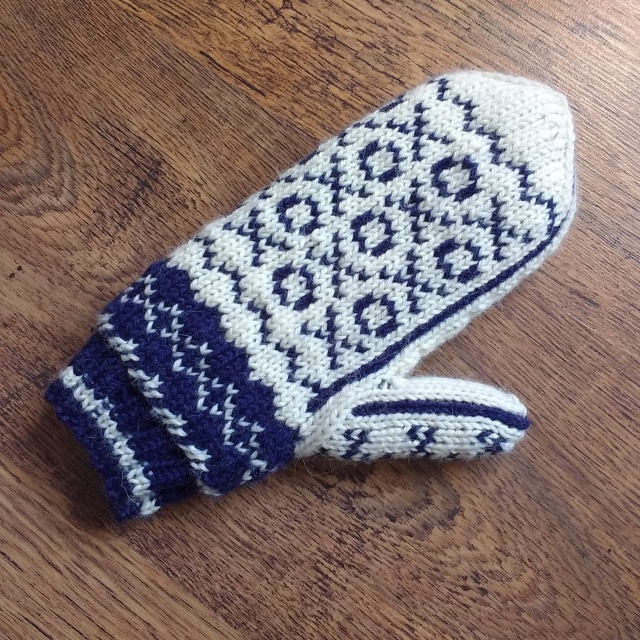
The Noughts and Crosses Mittens pattern is all done and I’m ready for testers! Yay!

Would you like to test this pattern? I’m looking for around 3 or 4 testers to knit up a pair of noughts and crosses mittens. You can be an experienced double knitter or a first timer, as long as you are able to read a chart, work on double pointed needles, increase and decrease stitches you should be fine.

You will have until the 15th of May, that’s 5 weeks, to complete your mittens, after which time I will send out a questionnaire about the pattern which you will need to complete. In return for testing my pattern you will receive not only the test copy but a copy of the final pattern too, free of charge. Not to mention a great big virtual hug for being awesome! 🙂

And you won’t need to work on your mittens alone! There will be a ravelry group set up for the testers to discuss the pattern, and troubleshoot any issues that arise. I can also be contacted directly here, on instagram, or on facebook. And there are accompanying tutorial videos on youtube (which you will be sent the link to) which it would be helpful if you could watch too.

Interested, or know someone who might be? Please fill out the form below, before Tuesday (12/4) and I will be in touch with the successful testers soon after.

Fancy pattern testing for me, but not this pattern? Don’t worry! There will be more patterns needing tested soon. Watch this space!

Cheers m’dears! 🙂


New patterns in progress!

Who would like a sneaky preview of my next two knitting patterns? If you follow me on Instagram you’ll already have seen bits of them but here, today, I’m going to give you a bit more information 🙂

First up is the Naughts and Crosses Mittens:

image

I’m really excited about this pattern because it’s my first to use double sided knitting, meaning these mittens are fully reversible!

Wait, what?!

That’s right! Reversible mittens, knitted in the round, both layers at the same time. And not only that, but it’s not as difficult as it sounds 🙂 And to prove it, that photo above is the inside of the mittens!

I’m even making YouTube tutorial videos to go along with this pattern, which is a huge first for me as I don’t like being filmed. This is actually what’s slowing down the release of this pattern, as I’m reliant on the (apparently impossible) combination of good natural light and no noise children about. But the first is done and I’m hoping to get the second shot tomorrow *fingers crossed*

And if you really don’t fancy making them double sided, the pattern is just as easy to follow using intarsia. But it’s always good to learn a new technique 😉

My second pattern (which is as yet unnamed) will be a ladies cardigan with a feather pattern on the yoke. I made a swatch last night and I’m really pleased with it, so as soon as the mittens are all done I’ll be ready to cast on.

image

I love the colours of this one, the photo doesn’t really do it justice. It’s a lovely sea green and a stony grey. I’m really looking forward to finishing (and wearing!) this one!

So that’s what I’m up to pattern wise, with more lurking in the background to follow. I’m actually also knitting myself a jumper using one of the free DROPS patterns, but it’s in 4 ply and will take me approximately forever to finish 😉 However it will be gorgeous when it’s done, so worth the effort!

What are you up to? Anything exciting on your needles? 🙂

Secret book safe

OK, so if you follow me on Instagram you’ll have seen a sneaky preview of this project (along with a promise to get this post written last week, but, you know, life and stuff…) And here it is!

The idea for this actually came from an excellent book I bought big brother for Christmas, called “The Boys Book of Things To Make”.
image

If you have a little boy I can highly recommend tracking down a copy of it, it’s fab! Full of fun craft projects and aimed at just the right level for kids to get involved with.

But this book safe isn’t only a good project for kids, it’s actually quite a good idea to have around the house. My husband is already planning on hiding things (credit cards, passports, etc) in it when we’re away. I might have to make another one for him to avoid arguments 😉

For this project you will need:

One large, hardback book
Craft knife
Ruler
PVA glue
Paintbrush

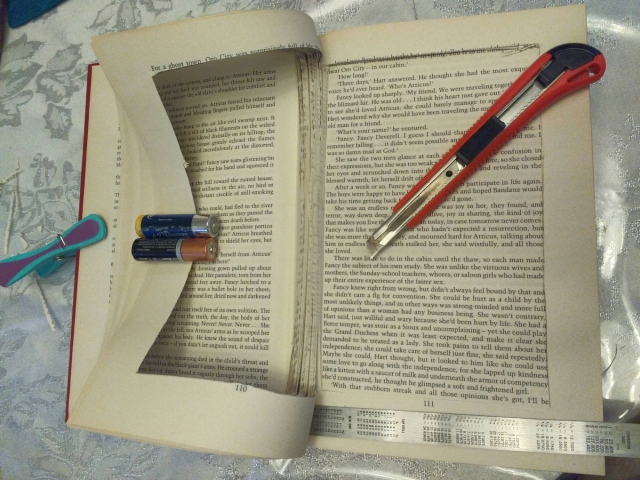
Open the book and flip passed the first few pages, the idea being that it’ll look like a regular book to a casual observer (this is hilarious if you’re 3 apparently!). Then with the ruler and craft knife you need to start cutting out the centre of the remaining pages. As a rough guide the outside edge of the text area is an ideal line to follow. You don’t want to cut too close to the edge of the pages otherwise your book safe won’t be strong enough to hold anything without buckling.

image

You won’t be able to cut through all the pages in one go, so find something heavy to weigh down the cut pages after you’ve turned them.

This is the long part, especially if you’ve chosen a 600+ page book… 😉 So if you’re doing it with a little person, don’t be surprised if they lose interest a little at this point.

Don’t worry if your craft knife slips a little while you’re cutting, as long as it isn’t on the first page you won’t be able to see it when you’re finished.
image

Continue until there are roughly 10 pages left at the end of the book. Then put down your craft knife and retrieve your small person for the next fun part 🙂

The final part of the project is to glue the cut pages together to create a solid box in which to hide your treasures. Pour a little of the PVA glue into a dish and water it down with slightly less than the same amount of water. Mix until you have a thinned glue mixture and paint it liberally onto the insides and outsides of the cut pages of your book.
image

Place something non stick between the cut and glued pages and the first pages in the book (you don’t want them to stick together otherwise it defeats the purpose somewhat!). Close your book and weigh it down to dry, this will help the pages to stick.

image

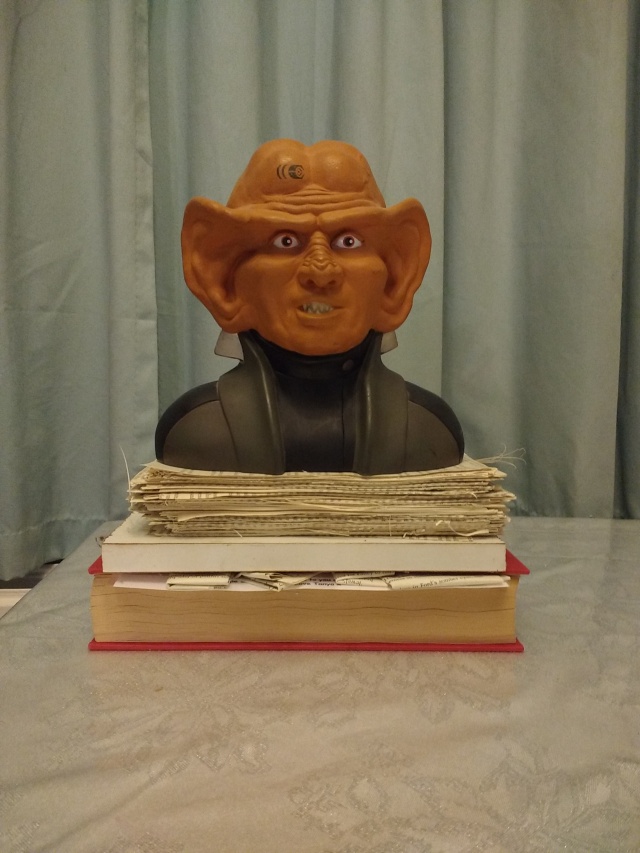
Meet our ferengi. He’s full of pennies so is nice and heavy for the job!

Leave overnight and repeat the gluing process if necessary. And now you have your very own secret hiding place!

image

Personalised trinket dishes

Hands up: who’s not ready for Christmas yet? Not just me I hope!

If you’re still looking for an easy little present or stocking filler, here’s a very simple idea that doesn’t take long to do.

Personalised trinket dishes

You will need:

Porcelain dishes (or mugs/cups/plates)
Porcelain pen
An idea of something to doodle!

I would recommend using a proper porcelain pen and not just a marker, as it will mean your finished piece can safely be washed without your design coming off. I bought mine at hobbycraft. This one can (apparently, I’ve not tested it yet!) even be put through the dishwasher at up to 50°!

Then comes the fun part: drawing on your design!

image

I’ve gone for simple repeating patterns to keep it easy to decorate, but you could go as complex or personalised as you like. For example: write a word, name or phrase; draw a more complex picture; a significant date or location. Really, you’re only limited by your imagination!

It’s also good to know that until the ink is fully dry and set, you can still wash off your design and start again if you’re not happy *phew* 😉

Then just follow the instructions on your marker. I’ve got to leave mine to dry for 4 hours, bake for 30 minutes at 160° before leaving them to cool completely in the oven.

I’ve got some cups and saucers I’ve been meaning to decorate for myself for ages. Maybe once the Christmas craziness is over I’ll have a chance to do it!

Happy crafting! 🙂

Simple crocheted Santa hat (with free pattern!)

Eeee! It’s December! I’m so excited for Christmas this year! With big brother being 3 1/2 now he’s getting excited and I’m really looking forward to making it magical for him 🙂 Little brother obviously still has no idea what’s going on but he’s enjoying looking at the Christmas tree and all our decorations.

Speaking of little brother, I really can’t believe he’s going to be 1 in only 11 days! My little baby is nearly a proper toddler, this has been a very quick year!

But anyway, back to Christmas:

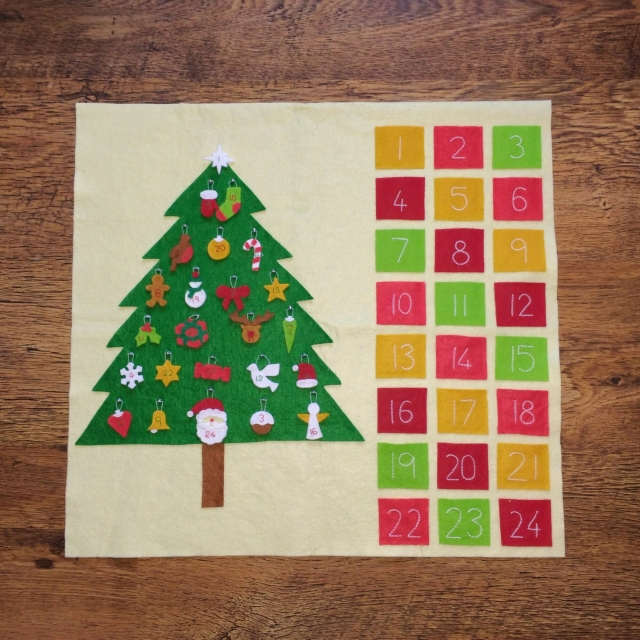
I’ve made a couple of new things so far this year. First of all I made a felt advent calendar which I’m very pleased with, and which big brother is really enjoying every morning:
image

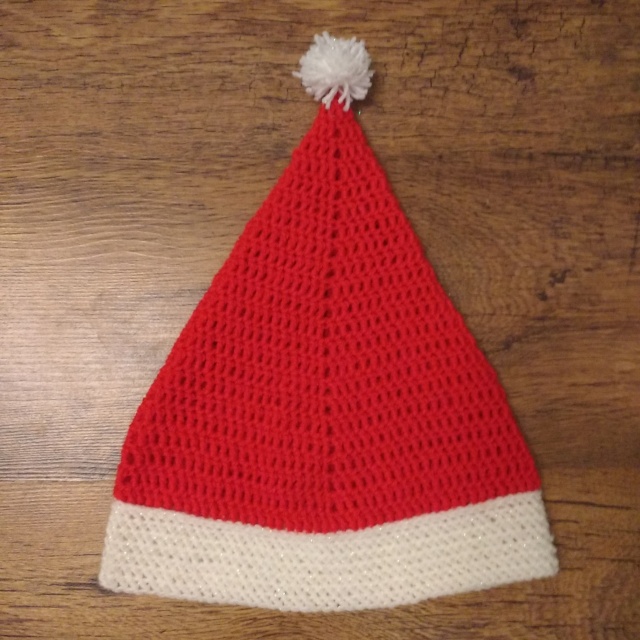
The next thing I whipped up was this very quick and easy crocheted Santa hat:
image

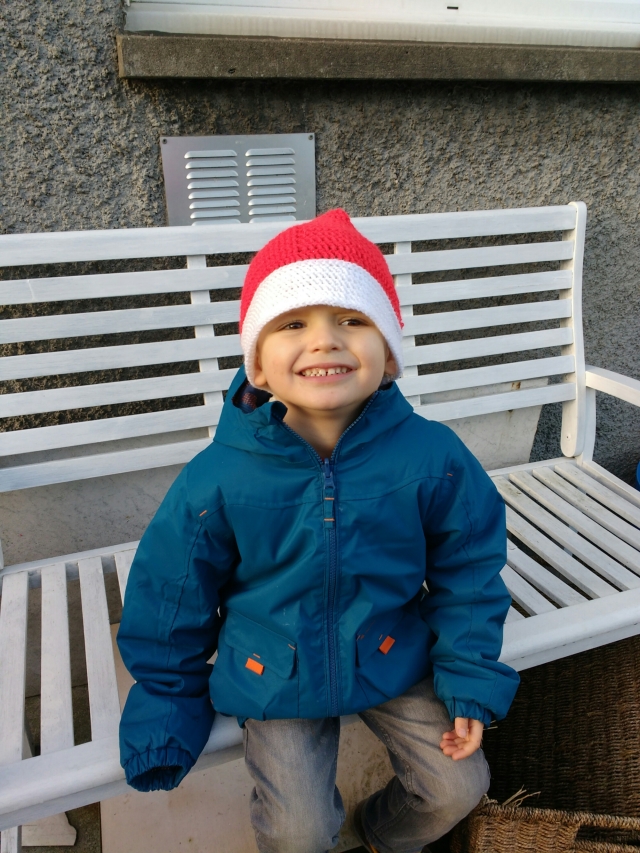
It was made entirely on a whim and with leftover yarn in my stash. But I’m pretty pleased with how it turned out, and, even better, big brother loves it and proudly tells everyone that I made it for him 🙂
image

As you can see from the photo it is a little bit on the big side, so if you wish to make it smaller then start with ch 88 white then skip the row 2 of the red instructions so that the first ‘sk next tr’ comes after 21 stitches, not 22. Likewise if you wish to make it bigger then ch 96 and add an extra row with the ‘sk next tr’ decrease after 23 stitches.

I hope that makes sense! Actually, I hope this whole pattern makers sense, I’ve never written a crochet pattern before, or even followed one for that matter! So if anyone has any (constructive!) criticism about my instructions please let me know 🙂

Simple Crocheted Santa Hat

Materials:
Red and white dk weight yarn, approximately 40g of red and 20g of white.
3.5mm crochet hook
Wool needle
Pom pom made from the same white yarn as the band.

White band
Row 1: ch 92 then join chain into a circle with a sl st into 1st stitch.
Row 2: ch 2, 91 dc in every remaining ch, join in 2nd chain of beg ch-2.
Row 3-7: ch 2, 91 dc in front lp of each previous row dc, join in 2nd chain of beg ch-2, fasten off.

Red hat
Row 1: change to red yarn, make a slip knot, sl st into back lp of last white dc, ch 1, tr 91 in back lp of each dc of last white row, join in beg ch-1.
Row 2: ch 2, (tr 21, sk next tr, tr in next tr) 3 times, tr 21, join in 2nd chain of beg ch-2.
Row 3: ch 2, (tr 20, sk next tr, tr in next tr) 3 times, tr 20, join in 2nd chain of beg ch-2.
Row 4: ch 2, (tr 19, sk next tr, tr in next tr) 3 times, tr 19, join in 2nd chain of beg ch-2.
Row 5: ch 2, (tr 18, sk next tr, tr in next tr) 3 times, tr 18, join in 2nd chain of beg ch-2.
Row 6: ch 2, (tr 17, sk next tr, tr in next tr) 3 times, tr 17, join in 2nd chain of beg ch-2.
Row 7: ch 2, (tr 16, sk next tr, tr in next tr) 3 times, tr 16, join in 2nd chain of beg ch-2.
Row 8: ch 2, (tr 15, sk next tr, tr in next tr) 3 times, tr 15, join in 2nd chain of beg ch-2.
Row 9: ch 2, (tr 14, sk next tr, tr in next tr) 3 times, tr 14, join in 2nd chain of beg ch-2.
Row 10: ch 2, (tr 13, sk next tr, tr in next tr) 3 times, tr 13, join in 2nd chain of beg ch-2.
Row 11: ch 2, (tr 12, sk next tr, tr in next tr) 3 times, tr 12, join in 2nd chain of beg ch-2.
Row 12: ch 2, (tr 11, sk next tr, tr in next tr) 3 times, tr 11, join in 2nd chain of beg ch-2.
Row 13: ch 2, (tr 10, sk next tr, tr in next tr) 3 times, tr 10, join in 2nd chain of beg ch-2.
Row 14: ch 2, (tr 9, sk next tr, tr in next tr) 3 times, tr 9, join in 2nd chain of beg ch-2.
Row 15: ch 2, (tr 8, sk next tr, tr in next tr) 3 times, tr 8, join in 2nd chain of beg ch-2.
Row 16: ch 2, (tr 7, sk next tr, tr in next tr) 3 times, tr 7, join in 2nd chain of beg ch-2.
Row 15: ch 2, (tr 6, sk next tr, tr in next tr) 3 times, tr 6, join in 2nd chain of beg ch-2.
Row 16: ch 2, (tr 5, sk next tr, tr in next tr) 3 times, tr 5, join in 2nd chain of beg ch-2.
Row 17: ch 2, (tr 4, sk next tr, tr in next tr) 3 times, tr 4, join in 2nd chain of beg ch-2.
Row 18: ch 2, (tr 3, sk next tr, tr in next tr) 3 times, tr 3, join in 2nd chain of beg ch-2.
Row 19: ch 2, (tr 2, sk next tr, tr in next tr) 3 times, tr 2, join in 2nd chain of beg ch-2.
Row 20: ch 2, (tr 1, sk next tr, tr in next tr) 3 times, tr 1, join in 2nd chain of beg ch-2.
Row 21: ch 2, (sk next tr, tr in next tr) 3 times, join in 2nd chain of beg ch-2, fasten off.

Finish by sewing in the ends and attaching a pom pom on the top. Then wear and spread Christmas cheer! 🙂

Chilly mornings just got cosier!

Well, for one small person anyway 😉

Big brother has been in need of a new dressing gown to keep him warm on chilly mornings. As in, he was still squeezing into one meant for a 1 year old… So ages ago we chose a lovely beach towel from IKEA (when it was in the sale, obviously 😉 ) and I intended to turn it into a new ‘big boy’ dressing gown.

But then the towel got put away and it slipped down the to do list. Until this week that is! I actually intended to start on Wednesday but I forgot I hadn’t prewashed the towel, so that had to come first. No point putting in all the effort of making something, just to have it shrink or warp in a strange way on the first wash.

So by Friday I finally had that magical combination of prepared fabric, the desire to sew, and little brother napping. Project dressing gown was a go!

I drafted a quick pattern based on big brother’s measurements, with some growing room to ensure it lasts him a while. I also used every shortcut I could think of to make it as quick and easy a project as possible.

For example:
* there are no side seams as I cut the whole body from the width of the towel with the arm holes cut out

image

* the loops to hold the tie are the offcut pieces of the selvedge edge, just trimmed to the seam line.

image

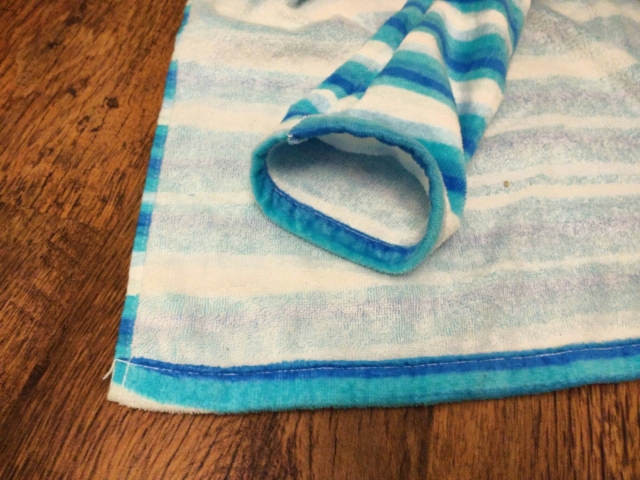
* I used the hemmed edges of the towel for the bottom hem and the sleeve ends so there was no hemming needed.

image

So with minimal sewing we ended up with:

image

One very grown up looking little man! And it must be comfy because he said “mummy, I really love my new dressing gown. I’m going to wear it all day till bedtime!” Which, I think, is about as big a compliment as you can get from a three year old 😀

Now, I haven’t included a copy of my pattern here, would you be interested in it? Comment below and let me know, and if you ask really nicely I’ll try to find the time to do it! 😉 haha

New knitting pattern: falling leaves hat and scarf!

I’m excited to say that my first lace knitting pattern is now available to buy here on Ravelry and you can also buy it by clicking the link (no need to be a ravelry member):

image

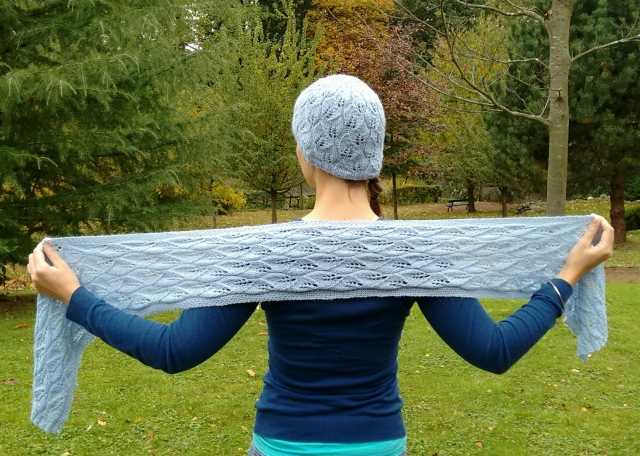
It’s a classy leaf lace pattern hat and scarf, knitted in beautifully soft DROPS Alpaca yarn which will appeal to experienced and new lace knitters alike. It is an excellent choice for a first lace knitting project as it only requires a few stitches to create a beautiful repeating leaf pattern. The pattern is also classy enough to take you from everyday wear to a night out, all while staying nice and cosy.

image

The pattern includes instructions for two different hat sizes: S/M (teenage/small adult) and M/L (adult), and a one size fits all scarf, with both written instructions and a chart.

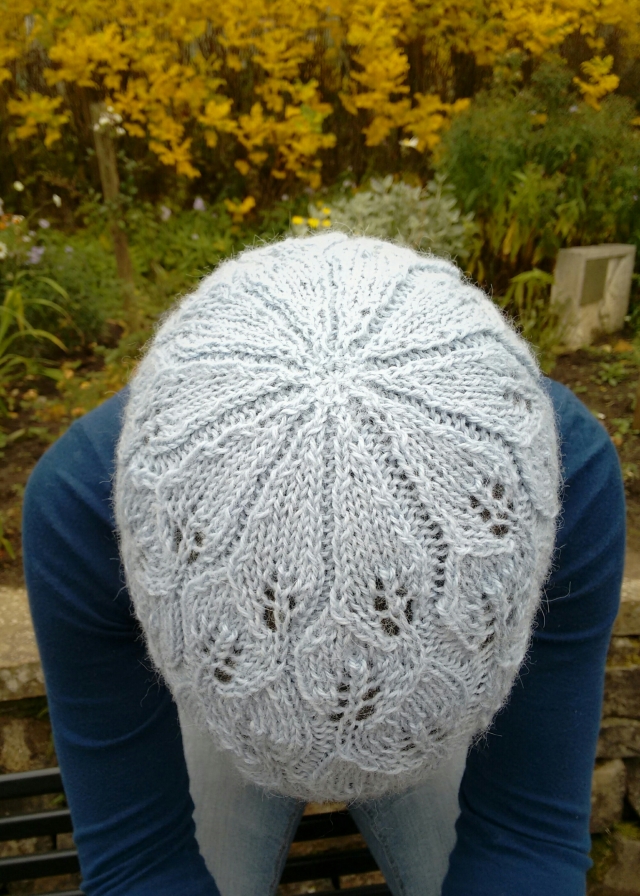
The hat has been designed so that the leaf pattern continues to the crown, so there is no break in the pattern and the leaves cover the whole hat. It is worked in the round on either a circular or double pointed needles.

image

The 2 part set requires 150g (3 x 50g balls) of DROPS Alpaca yarn, using 50g for the hat, and 100g for the scarf. It is knitted on 3.75mm needles.

And you’ll be please to know it’s already been tested against the winds brought over by ‘Abigail’ and kept me nice and cosy 😉

I hope you like it! Let me know what you think 🙂

Cosy Seed Stitch knitting pattern set!

New knitting patterns!!!

I’m very pleased to announced that my new knitting patterns are now available in my Ravelry store! Not a member? No problem! You can also buy it by clicking on the links below:

Wrist warmers:

Headband:

Buttoned cowl:

It’s a beginner level 3 part set to create wrist warmers, a headband and a buttoned cowl. Autumn isn’t that far away (unfortunately!) and this cosy set will keep you warm on chilly days.

image

It’s a perfect first knitting pattern set as it introduces both knit and purl stitches to create texture, using ribbing and seed stitch, which adds interest to the finished pieces. The head band and wrist warmers are knitted flat and seamed, for ease of construction.

More experienced knitters will also like the speed you can complete this set, thanks to the chunky yarn, which makes it a great choice for hand knitted gifts.

The pattern contains instructions for two sizes: S/M for teenagers and small adults, and M/L for adults.

And I currently have a special offer of all three patterns for just £5! Simply add all 3 to your cart on Ravelry and the discount will be applied automatically. Alternatively each piece can be bought individually for just £2.

Wrist warmers:

Headband:

Buttoned cowl:

I hope you like it! I’m looking forward to seeing some finished pieces made from it 🙂