Secret book safe

OK, so if you follow me on Instagram you’ll have seen a sneaky preview of this project (along with a promise to get this post written last week, but, you know, life and stuff…) And here it is!

The idea for this actually came from an excellent book I bought big brother for Christmas, called “The Boys Book of Things To Make”.
image

If you have a little boy I can highly recommend tracking down a copy of it, it’s fab! Full of fun craft projects and aimed at just the right level for kids to get involved with.

But this book safe isn’t only a good project for kids, it’s actually quite a good idea to have around the house. My husband is already planning on hiding things (credit cards, passports, etc) in it when we’re away. I might have to make another one for him to avoid arguments 😉

For this project you will need:

One large, hardback book
Craft knife
Ruler
PVA glue
Paintbrush

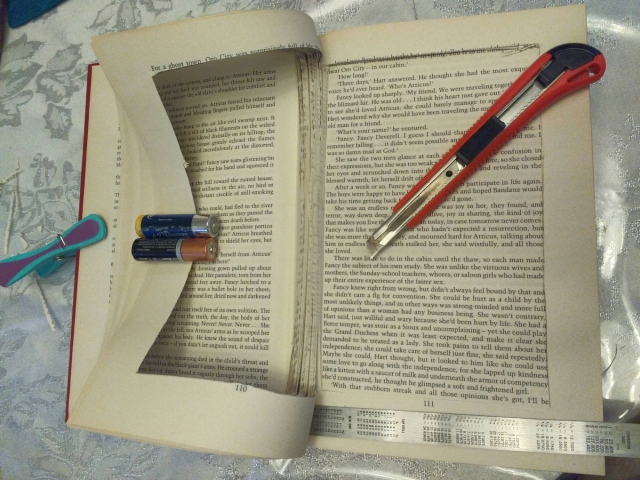
Open the book and flip passed the first few pages, the idea being that it’ll look like a regular book to a casual observer (this is hilarious if you’re 3 apparently!). Then with the ruler and craft knife you need to start cutting out the centre of the remaining pages. As a rough guide the outside edge of the text area is an ideal line to follow. You don’t want to cut too close to the edge of the pages otherwise your book safe won’t be strong enough to hold anything without buckling.

image

You won’t be able to cut through all the pages in one go, so find something heavy to weigh down the cut pages after you’ve turned them.

This is the long part, especially if you’ve chosen a 600+ page book… 😉 So if you’re doing it with a little person, don’t be surprised if they lose interest a little at this point.

Don’t worry if your craft knife slips a little while you’re cutting, as long as it isn’t on the first page you won’t be able to see it when you’re finished.
image

Continue until there are roughly 10 pages left at the end of the book. Then put down your craft knife and retrieve your small person for the next fun part 🙂

The final part of the project is to glue the cut pages together to create a solid box in which to hide your treasures. Pour a little of the PVA glue into a dish and water it down with slightly less than the same amount of water. Mix until you have a thinned glue mixture and paint it liberally onto the insides and outsides of the cut pages of your book.
image

Place something non stick between the cut and glued pages and the first pages in the book (you don’t want them to stick together otherwise it defeats the purpose somewhat!). Close your book and weigh it down to dry, this will help the pages to stick.

image

Meet our ferengi. He’s full of pennies so is nice and heavy for the job!

Leave overnight and repeat the gluing process if necessary. And now you have your very own secret hiding place!

image

Personalised trinket dishes

Hands up: who’s not ready for Christmas yet? Not just me I hope!

If you’re still looking for an easy little present or stocking filler, here’s a very simple idea that doesn’t take long to do.

Personalised trinket dishes

You will need:

Porcelain dishes (or mugs/cups/plates)
Porcelain pen
An idea of something to doodle!

I would recommend using a proper porcelain pen and not just a marker, as it will mean your finished piece can safely be washed without your design coming off. I bought mine at hobbycraft. This one can (apparently, I’ve not tested it yet!) even be put through the dishwasher at up to 50°!

Then comes the fun part: drawing on your design!

image

I’ve gone for simple repeating patterns to keep it easy to decorate, but you could go as complex or personalised as you like. For example: write a word, name or phrase; draw a more complex picture; a significant date or location. Really, you’re only limited by your imagination!

It’s also good to know that until the ink is fully dry and set, you can still wash off your design and start again if you’re not happy *phew* 😉

Then just follow the instructions on your marker. I’ve got to leave mine to dry for 4 hours, bake for 30 minutes at 160° before leaving them to cool completely in the oven.

I’ve got some cups and saucers I’ve been meaning to decorate for myself for ages. Maybe once the Christmas craziness is over I’ll have a chance to do it!

Happy crafting! 🙂

Review: MakeMee Fox Travel Buddy by LuMoo

I just had to write a review of this fantastic craft kit, as young sir and I have had so much fun making it!

He got his Fox travel buddy as a Christmas present, and I must admit I was a little sceptical at first about whether he would enjoy making it. But I’m very happy to say that he did!

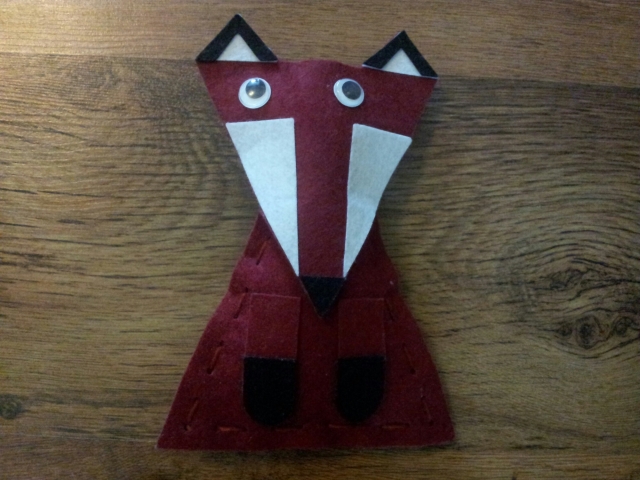
The kit comes with everything you need to make your travel buddy, a blanket to keep them cosy on their travels, a travel case and a passport notebook. There’s some basic sewing to do, sticking and cutting out, so mummy’s help was definitely needed. But an older child should be able to make the whole thing unaided.

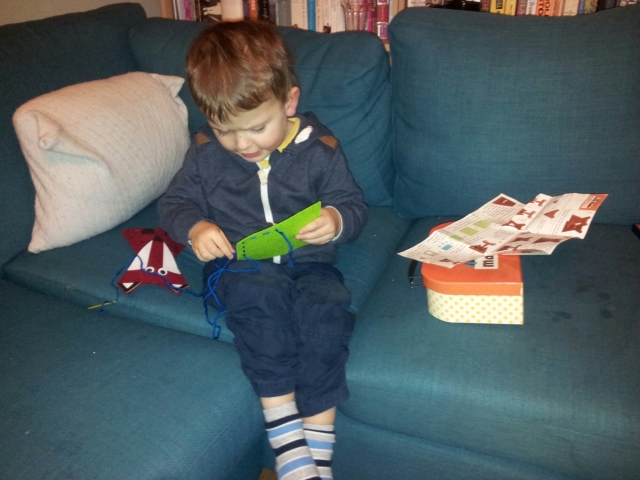
First task was sewing the body front and back together using a running stitch and a nice, child friendly, round pointed needle. He really quickly got the idea of poking the needle through the pre-cut holes, and pulling the wool taught. After the first few I didn’t really need to help him other than pointing him in the right direction and reminding him not to pull the needle off the end! I was very impressed and he really enjoyed it. When Daddy came home from work half way through he was excitedly told all about “sewing my fox friend”. So sweet!

I had envisioned it being a multi-day task, but he insisted on finishing the whole thing before bed that night! After the sewing we had to stick on fox’s features. He loved checking the instructions to see if we were doing the right thing, and matching the sticky pieces to the pictures before we peeled off the backing paper. I helped him position the pieces and he stuck them down (with glee!).

Finally we stuffed him and sewed up the final seam before Mummy had to tie a knot in the wool and cut the ends.

image

Fox, as he has imaginatively been named, has become a firm friend already, and has been on a trip to visit Granny and Grandad. We’ve also made a start on decorating his blanket and I’m looking forward to all the fun adventures we can have with him.

image

I have great plans about sending Fox off on his travels around the world as a way for us to learn about other countries and cultures. If we are successful in this I’ll (try to remember to!) share with you how we’re getting on and what works well.

Easy, no sew infant car seat blanket

It can be tough to know what to dress babies in with the cold weather, especially as thick padded snow suits are not recommended for use in a car seat. And blankets shouldn’t go under the straps and when they are laid on top they can be kicked off. So how do you keep baby warm?

It’s easy! (in every sense!)

You will need:

  • A piece of fleece at least 30 x 40 inches (I cut up one of the really cheap IKEA fleece blankets which only costs £1.50! And now I have more fleece left over for another project)
  • Scissors
  • Tape measure

Cut out a rectangle which measures at least 40 inches wide, by 30 inches high. If you want to get a little bit fancy you can round the corners like I did, but it makes absolutely no difference to the final thing!

Then fold the blanket in half vertically to make a rectangle of 20 x 30 inches. Half way up the blanket, on the fold, cut a straight line in from the edge, through both layers, 1.5 inches long (so when the blanket is unfolded the hole is 3 inches wide). This is the hole for the clip part of the seatbelt to go through (does that bit have a proper name? Am I just having a major baby brain moment?!).

Feed the clippy bit through the hole on your baby’s car seat. You’ll probably find there’s a little fold over needed at the top edge of the blanket under the shoulder straps, but it leaves room to grow!

2015-02-10 15.46.13

Then find yourself an adorable baby and pop them in it!

2015-02-10 15.47.11

As you can see you strap them in before you cover them with the blanket. Then fold the blanket like an old fashioned swaddle, folding over the excess at the feet, and you’ll have one toasty little baby all ready to go!

2015-02-10 15.47.58

He is never that happy to go in his car seat when it’s actually going in the car… How can he tell the difference?!?

Tutorial: yarn wrapped wreath

I love handmade Christmas decorations. I think it’s so nice to have unique and individual looking homes at Christmas time, not just straight from the shop. Don’t get me wrong, there’s a place for shop bought too, but I love to see some homemade bits in the mix.

Last year I made us all new Christmas stockings:

image

(get the free pattern and tutorial here). I also made some festive bunting which I don’t think I showed you, but as it went up yesterday I can show you now!

image

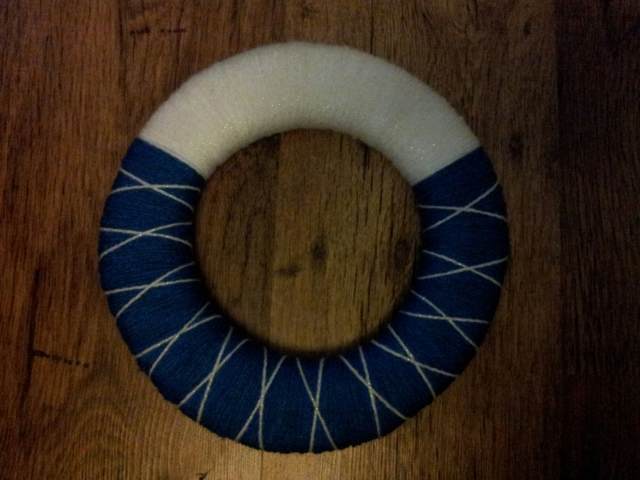
My first new addition this year is a yarn wrapped wreath for our living room door. I chose a dark blue and a sparkly white acrylic yarn, nothing expensive, to match our color scheme.

You will need:
Yarn
Empty cereal box
Bubble wrap
Tape
Yarn sewing needle

To start with I opened out an empty cereal box and drew 2 concentric circles on it. I made the hoop about 5cm/2″ wide and made the outer circle as large as my box would allow. You can make your hoop any size you like, I’m thinking of doing a mini one for young sir’s wardrobe door, and the technique is exactly the same. Don’t worry if your hoop goes over a bend in the box. It’ll all be stiffened up as we go on.

image

I didn’t want my wreath to be too 2 dimensional, but I also don’t have hours to spend on wrapping the yarn. So I cheated! I bulked up my hoop using strips of bubble wrap, about 7/8cm wide, wrapped round the cardboard. Start by taping one end of a piece of the bubble wrap to the hoop, then start to wrap it around. Depending how much you want to bulk up your wreath will depend how much of an overlap you use. I left about 1.5cm between edges.

image

image

Continue wrapping until the whole hoop is evenly covered, taping the ends of each piece in place.

image

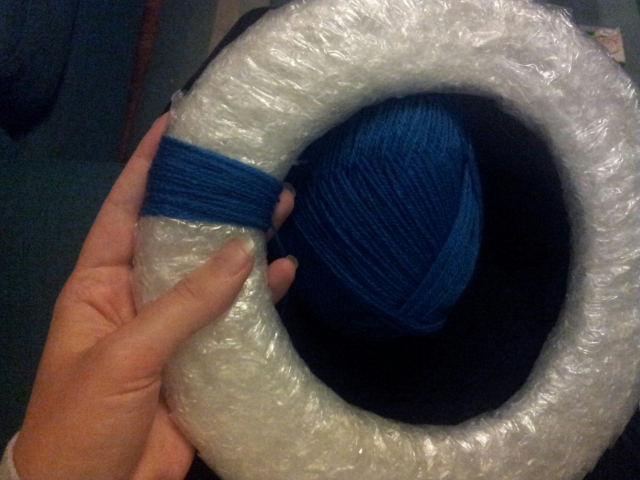
Now it’s time to start wrapping the yarn. My hoop is big enough to pass the whole ball of yarn through, but if you’re making a small wreath then you’ll have to cut lengths of yarn to wrap.

Simply wrap the yarn round and round on top of the bubble wrap, but not too tight or it defeats the purpose of bulking up the hoop! You’ll need the yarn to be at least 3 passes deep to give a nice full look. Just wrap:

image

And wrap!

image

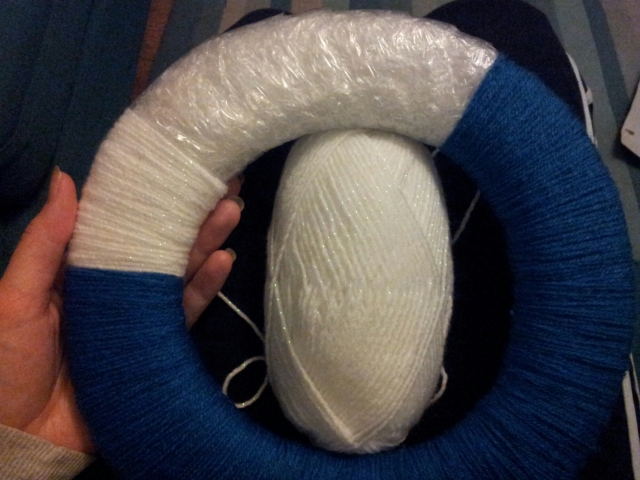
I decided to have a 2 colour wreath, with blue covering 3/4 of the surface and the sparkly white on the top 1/4. So once I was happy with the amount of blue on my wreath I switched yarns and continued to wrap:

image

Until the whole surface was covered. I also added some white crosses onto the blue section, which I simply did by wrapping at an angle from one end of the blue to the other end, then back again. Once you’re finished wrapping, use your wool needle to tuck the ends away under the rest of the layers, and your wreath is complete!

image

You can add extra touches to it or leave it as is, depending on the look you want to go for. I was undecided between one big pompom in the centre and three small ones hanging from the bottom. In the end I chose to make one large pompom to hang in the centre of my wreath. To make it I wrapped my yarn 200 times round the top of a pint glass, which gives a large, floppy pompom. Then tied it round the centre, cut open the loops and trimmed it all to the same length.

image

Some other ideas for finishing touches: you could hang ribbons from the bottom, a bauble in the centre, or even make a dreamcatcher style wreath with a yarny snowflake in the centre.

To hang my wreath I made a very simple twisted string using lengths of my two colours of yarn. Ta da!

wpid-wp-1418070255285.jpeg

A simple way to make a wreath, which is easy to customise and will last year after year 🙂

Quick tip: counting rows when knitting in the round

Obviously when using a circular needle or double pointeds you can’t use a regular stitch counter as there’s not a needle end to put it on. But you might still need to count your rows, so what should you do?

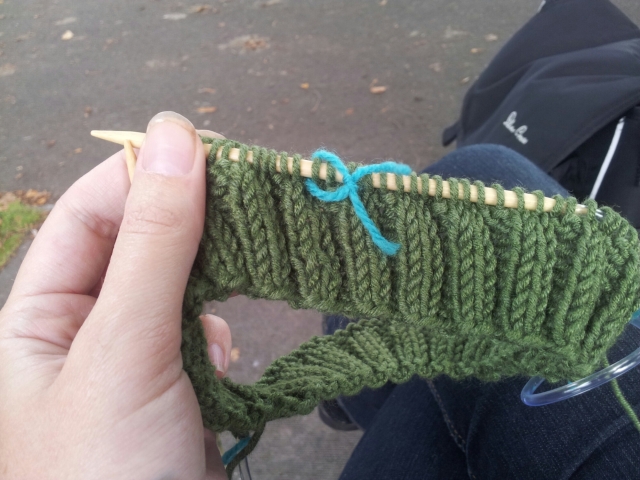
If your pattern repeats over a small number of rows as my current project does (4 in this case) then simply tie a slip knot in the tail left over from casting on each time you pass the tail. Then once you’ve completed the pattern simply untie the knots and start again. It’s a simple way to keep track and makes it much easier to leave your project and know exactly where you were when you come back.

image

If you need to count a large number of rows I would thread a stitch counter onto the tail and loosely tie it to the work. Then every time you pass the tail you add another row on the counter.

Easy! Hope you find it a useful little trick 🙂

Matching hats, and tips for knitting magic loop

image

OK, be honest, is this too much? Matching hats for young sir and new baby. I think they’ll look adorable. Well, I hope they’ll look adorable because they will be wearing their new hats come winter! (And yes, that may be a clue about the flavour of my bump!)

As I was knitting away in the park this afternoon, I thought it might be useful to pass on some tips I’ve picked up to make magic loop knitting a bit easier. If you’re unfamiliar with it, magic loop is a technique to use a long circular needle for a project with a small circumference. For example I’m using a 31 inch long needle to make baby and toddler hats. It is an alternative to using multiple double pointed needles.

I’m not going to go through the whole technique as there are already plenty of good instructional videos on YouTube, these are just my tips to make it a bit easier. I’m making the basic baby hat from Mama’s Stitchery Projects.

Tip 1:

When casting on, split your total number of stitches up into three even sections and place a stitch marker after each section (3 markers total). Now at each of the two markers in the centre of the work (the third marker is at one end) pull half of the excess length of the needle cable through, so that it looks like this:

image

See the two loops and the stitch markers? This is what your work should look like each time you finish one section and before starting the next. I know some videos say two sections is enough but I found that far too awkward, three gave me much more freedom of movement with the needles.

Tip 2:

Always remember to transfer your stitch markers! It’s so much easier to slip your marker than to have to count a third of the stitches each time you finish a section. Trust me 😉

image

Tip 3:

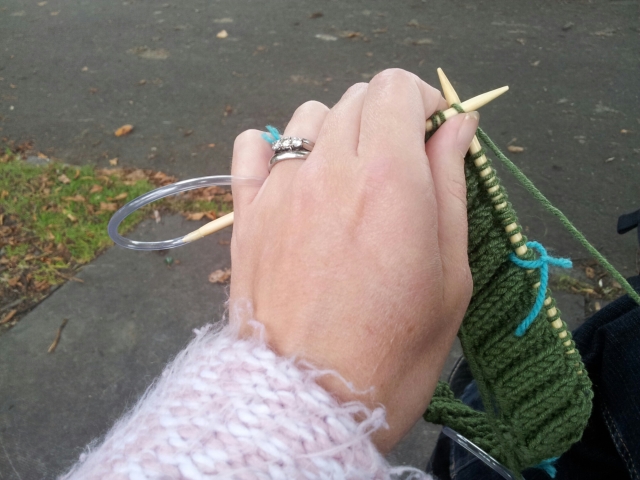
I find it easiest to put my left pinky finger through the loop of my needle while I’m working:

image

Otherwise I feel like my fingers are getting in the way, and it stretches the last few stitches too much.

So there you go, my three top tips for working with magic loop! I hope you find them helpful 🙂

Oh, and if you’re concerned I was being neglectful and ignoring young sir at the park, fear not. He got too excited at the prospect of going to play and fell asleep en route! Oh well!

image

Tutorial: Transforming a polo-neck jumper to a maternity* cardigan

*I’m including the ‘*’ as this isn’t specifically a maternity project. But the finished article is suitable for both maternity and regular wear so is a good project for anyone to try.

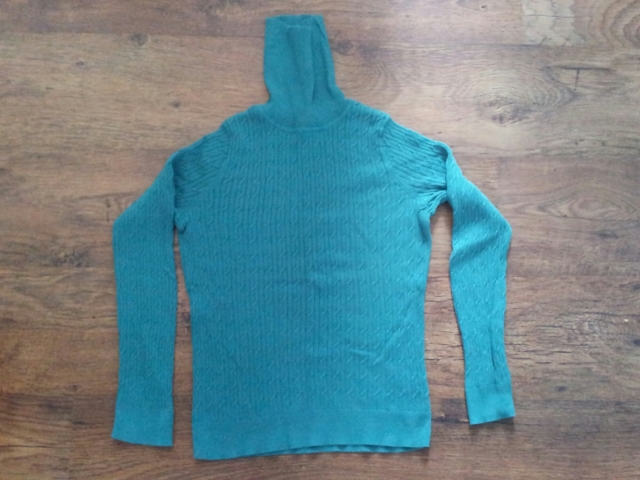
I bought this jumper in a charity shop about a year ago, for the enormous price of £1. Big spender, me 😉 I just loved the colour of it and I’m a fan of cabled jumpers in general. But I didn’t really like the neck, it was just that little bit too tight to be comfortable for me. So after wearing it once it hit the back of the wardrobe and has been there ever since. Which is a shame as I still like the colour and I still like the cables. So it was time to transform it into something I will wear.

image

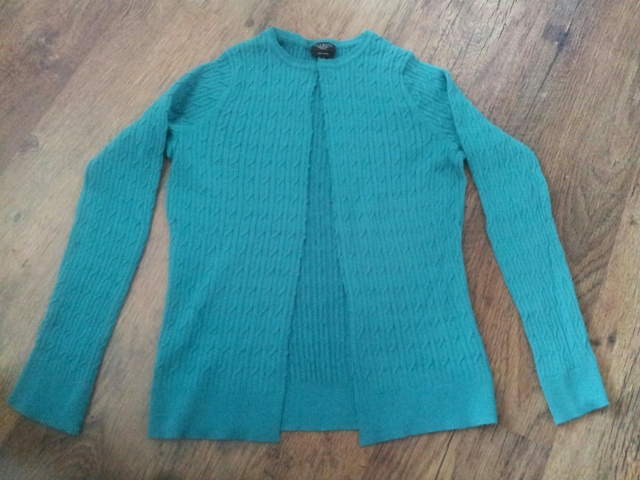
I could have just taken off the top and made it into a crew neck jumper, but by opening up the front as well and making it into a cardigan, I’m able to wear it now over my rapidly expanding bump, and it will be great for when baby comes and I’ll be spending hours breastfeeding.

The transformation was actually very easy. First thing I did was identify the centre of the jumper, which turned out to be the centre of a cabled row. Then I very carefully cut up the front of jumper using a nice sharp pair of scissors. Don’t be tempted to use general purpose scissors, as it’s the sharp edges which give you a clean cut and stop the fabric from shifting.
image

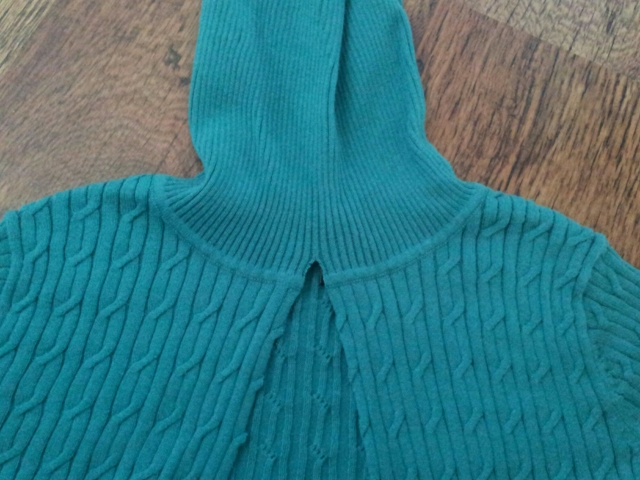
I only cut as far collar, as I have a faint notion of reusing the ribbing from the neck, but you could quite easily open up the whole of the front.

image

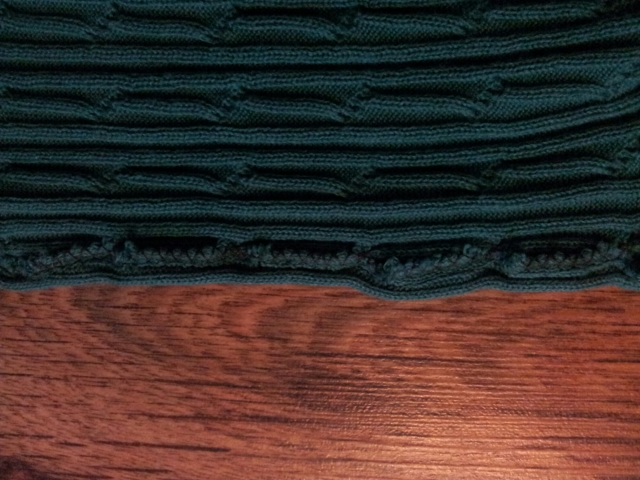
As you can see from the photo, there was quite a thick band joining the body of my jumper to the neck. I decided that this would become the new top edge of my cardigan, so I cut parallel to its top edge, leaving about 1cm of ribbing to finish off the neck line.

image

Looking like a cardigan already!

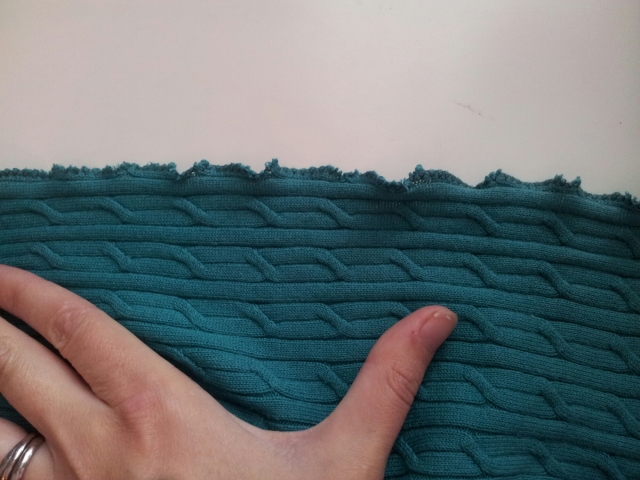
Next step is to finish off the cut edges to stop them fraying. I sewed along each front edge and around the neck using a zig zag stitch. Alternatively you could use an overlocking stitch as both will seal the raw edges.

I found that the zig zag stitch left the edges with a slightly frilly lettuce effect as it got a little stretched going through the machine. If this happens to you, don’t worry about it as you can reshape the edges at the end when you press your cardigan.

image

One thing to be aware of when finishing your raw edges, is that there will be a lot of little pieces of fluff will come off your cardigan and some of these will end up in your machine. Once you’ve finished your raw edges it’s a good idea to clean out all the fluff to keep your sewing machine running smoothly.

image

The final step was to create the new finished edges. To do this I pinned under the raw edge, so that a knit row was the new edge and folded far enough over that I could sew up the purl row to hide the stitches.

image

I used a straight stitch to sew the seam, and I sewed very slowly to make sure the same amount of fabric was sewn under the whole way down. I also found I had to take the pins out at least 5 – 7cm from the needle in order to get the best result.

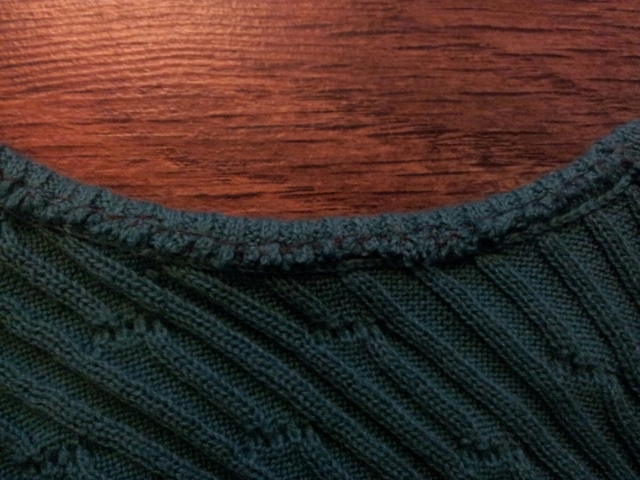
At the neck seam I decided to finish off my cardigan by hand as, unlike the front edges, there was nowhere to hide the stitches and I didn’t have any thread that closely enough matched the colour to blend in. So I used a whipstitch along the inside of the thick neck band, making sure to go slowly and check that my stitches weren’t coming through to the right side of the fabric.

image

As a final touch I also did some hand finishing along the front edges. However if you were converting a jumper made entirely in stocking stitch you could skip this step by sewing a double line instead. As I was trying to hide my stitches I decided that a hand finish would be neater and more invisible. At every cable I simply put in a few stitches joining the wrong side of the cable to the raw edge. This is enough to keep the raw edge away from the finished edge, and to stop it from curling around into view when the cardigan is being worn.

image

Finally give the new finished edges a good pressing to help them into the correct shape. This will help to take care of any remaining excess from the stretching earlier. Then slip it on, pose, and enjoy your new creation! (Silly face optional! Haha, I should explain I had a toddler trying to climb up my leg at the time!)

image

Note: you could add a top button if you fancied, like Delia does here. She also uses fabric to finish off her raw edges, giving a (probably better!) finish to the front edges. But still, I’m happy with my creation 🙂

Tutorial: Transforming regular leggings into maternity

As I mentioned here I am having real trouble finding any trousers that fit over my low down baby bump. Even the type that are cut incredibly low are a bit too diggy the second I sit down. And anything that does fit when I’m sitting down, will fall off when I stand up. Not really the best look to be flashing my pants at everyone followed by a pulling up the trousers dance!
So I thought I’d give leggings a go in the hope that the nice soft fabric will work against my poor squished bump! But have you seen the price of some pairs of maternity leggings? I mean really, for what is essentially exactly the same product with a little more fabric round the waist, I’m not sure why they cost so much more. (OK, so in the grand scheme of things they aren’t expensive, but I still object on principle.) And it also annoys me that most shops only stock their maternity clothes online. At a time when my body is a different shape at any two points throughout the day, never mind week to week, I’d rather spend my money on something I can try on first.

So I picked up a pair of regular leggings, which I knew fit eveywhere except my tummy, for £3, and set about turning them into maternity leggings.

image

It was actually a very simple transformation, all I had to do was remove the elastic from the front half of the leggings and sort out the waist band. Easy!

*At this point I’m going to apologise for the quality of the photos, my camera was having issues with the colour balance, and the dark thread on black fabric was really hard to capture. I’ve used dark grey thread instead of black in the hope that it will show up (at all!) but I’ll also explain each step along the way so hopefully it’s clear what I’m doing.

The first step was to take a look at how the waistband of the leggings was constructed. In my case the elastic was sewn into the seem so it was a little (but not much) more compicated than if the elastic was free to move in it’s own casing. In that case all you would have to do would be to fix the elastic at the side seams, open up a little hole to remove it from the front half, sew up the hole and you’re done!

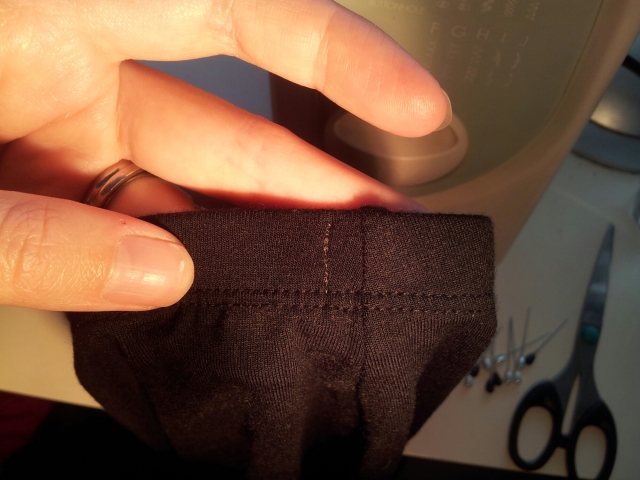
But if your elastic is sewn in like mine, then start by sewing a straight line to reinforce the ends of the elastic. Do this at the back side of the seam, so that you can open up the waistband at the seam for access to the elastic. I used a triple stitch to make it as strong as possible. Repeat the process at both sides.

image

Then carefully unpick the side seams to give you access.

image

Now we’re going to unpick the waistand along the whole front of the leggings. Do this carefully with a seam ripper to not damage the fabric. Once it’s opened from side seam to side seam and the elastic is free, you can cut the elastic out.

At this point I tried my leggings on, and they fit perfectly. The remaining elastic at the back was enough to keep them fitted, but they were soft enough round the front to be really comfortable even when sitting down.

Finally I re-sewed the waistband. If you don’t want to include this step you don’t have to. As the fabric for leggings is usually jersey, it doesn’t need to be finished as it won’t fray. And if you don’t plan on wearing them with some little cropped top then noone will be any the wiser!

I will finish off the waistband to show you how to do it. Basically you’re just resewing along the same line that the fabric was stitched before. If, like me, you don’t have an overlocker/serger then you can easily do it with a zigzag stitch. (I’m afraid I’ve never used an overlocker so I can’t tell you how to do it that way) The zigzag stitch is necessary as you want the seam to have some stretch, otherwise it defeats the purpose of this project! A basic straight stitch would either not stretch, or would try to do so and break.

Pin the waistband in place and sew all the way along the front. You might find (if you’re naughty like me and don’t use the proper needle for jersey fabric… Must buy a new one!) that your zigzag skips in places so you end up with a couple of straight stitches in the middle of your row. I’ve now worn my leggings, complete with these minor imperfections, for a few days and there is still plenty of stretch in the fabric along the waistband. So if the same happens to you, don’t worry about it. So long as the vast majority of your seam is a zigzag then it will do the job just fine 🙂

image

And here are the finished leggings! (Sorry, again, terrible tummy selfie alert! But I wanted to show you the end product in action.)

image

Tutorial: Kids Scribble Drawstring Pouch

Now that young sir is getting older and more interested in such things, I’ve been trying to come up with fun crafts for the two of us to do together. This one is really simple, and cheap, so you can easily make a whole load of them and ring the changes.

For the kids part you will need:

  • Plain fabric, natural fibres will hold the colour best. I used the unbleached cotton from IKEA, at  only £2/m it has become my go to fabric for so many projects!
  • Fabric markers

For the adult part you will need:

  • Scissors
  • Thread, either coordinating or contrasting, is entirely up to you.
  • Sewing machine, or a needle if you want to do it by hand.
  • Some form of ribbon or string for cinching the bag closed.

(Note: I say adult part, but if you have slightly older kids they might also enjoy this part of the project, with some guidance and supervision from you!)

First of all decide how big you want your bag to be. We went for a rectangular bag of 18cm (width) x 25cm (height) so I cut my piece of fabric 40cm (width) x 30cm (height).

Then comes the messy part! I highly recommend using old newspaper or cardboard under your fabric as the pens can leak through and you won’t want it on your floor or table! Then just grab a pen and have at it! I drew some shapes and objects (I was under strict instructions what to draw) and young sir coloured them in.

image

When we were finished I ironed the fabric to set the ink and make it permanent. If you skip this stage the ink will come out in the wash, which you could use to your advantage, for example draw an outline of something, set it, then the kids can colour it in differently each time and it will wash out.

Next I made the casing for the ribbon along the top of the bag. My ribbon is 15mm wide so I made the casing 20mm to make sure there was going to be plenty of room. I made it very simply by folding over and ironing down a section about 5mm wide from the top raw edge. Then I folded over the 20mm section and ironed again. By using the ironing technique you can save yourself time and effort as the fabric needs minimal pinning and only one line of stitching to create a casing with enclosed raw edges.

At this stage I inserted the ribbon as I find it easier to pull it through in a straight line, rather than trying to work it round a bend once the side seams are sewn.

image

Then sew up the side seams. You have a couple of options depending on what kind of finish you want, I decided to sew a double line of stitches with the raw edges folded over, but you could also use a single line or do a French seam. I used a French seam to sew up the bottom of the bag as that’s the seam that will be under the most stress when the bag is full. To do this I sewed the bag closed with the wrong sides together, turned it inside out, clipped the excess seam allowance and sewed again with right sides together.  For more in depth instructions on French seams check out my tutorial here.

image

(I switched to red thread so it would be easier for you to see where I sewed.)

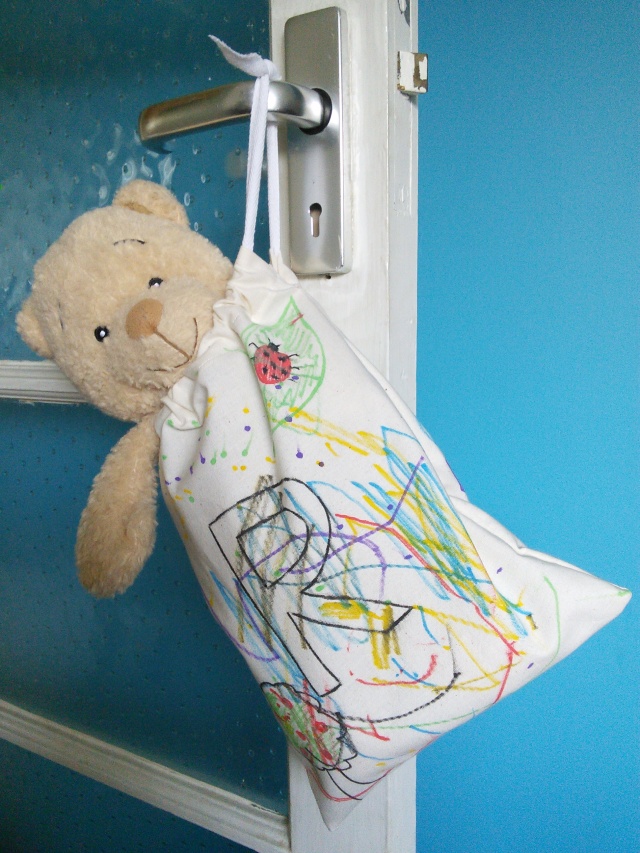
Then simply turn your bag right side out, tie a double knot in the ribbon, pack your teddy bear (or whatever treasures need carried!) and you’re good to go!

image